Using HistoryHound
Main Search Window
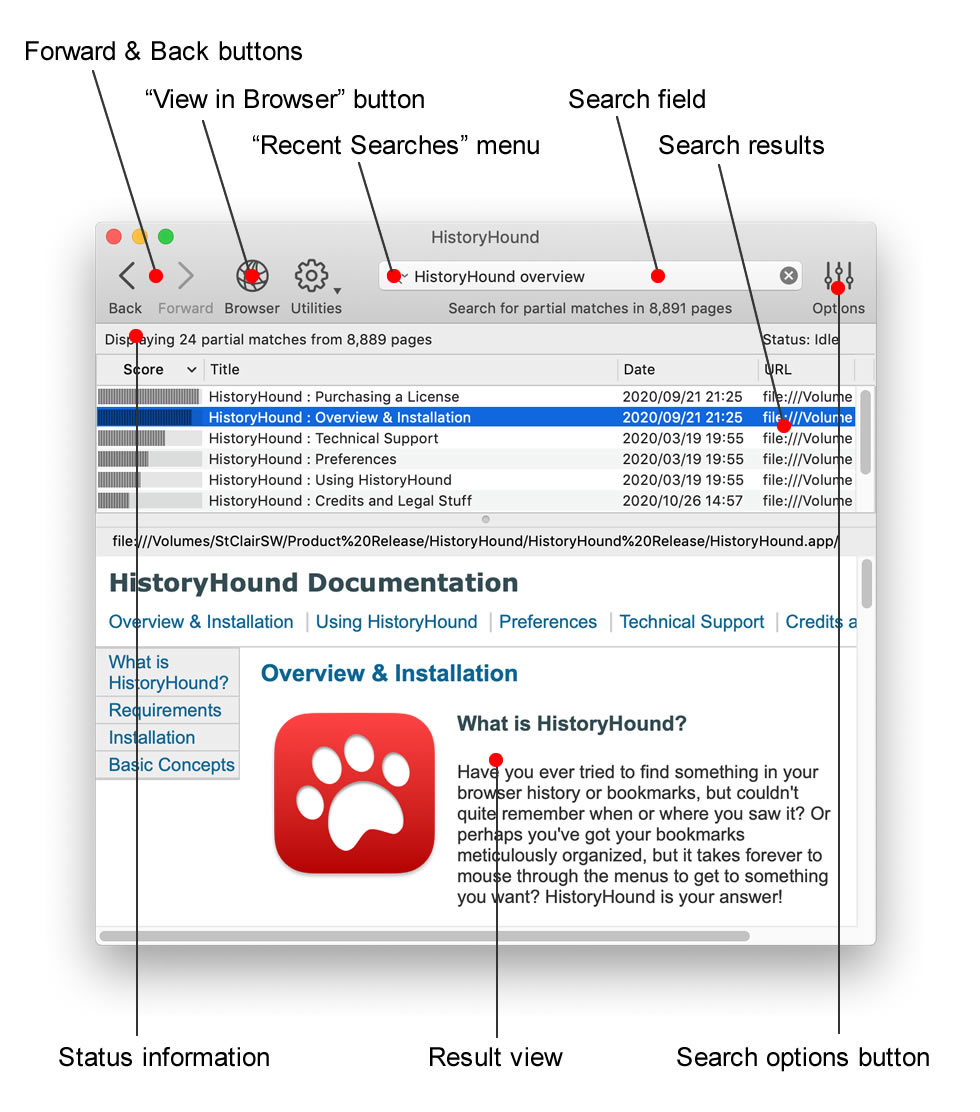
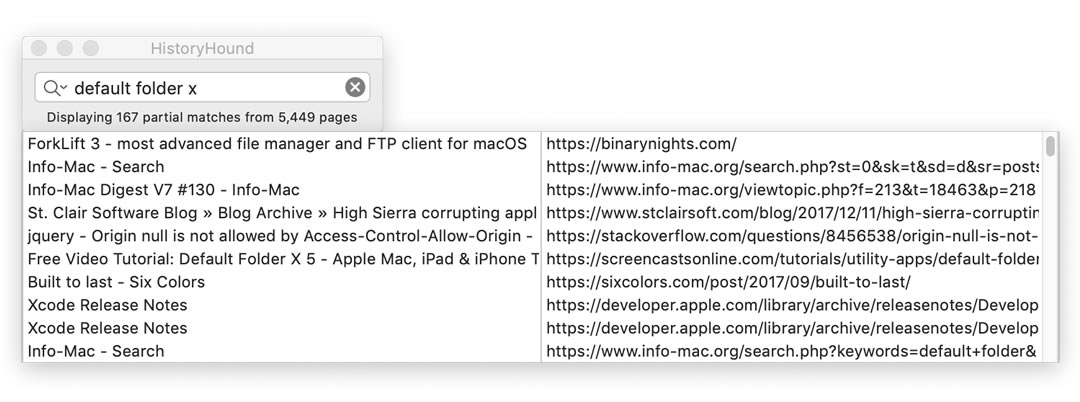
The main search window, shown at right, will greet you the first time you run HistoryHound. Its contents are very straightforward once you understand the basics. If you close the window, you can open it again by choosing Search Window from the Window menu.
To perform a search, simply do the following:
- Type your search terms into the search field. HistoryHound begins searching when you hit the Return key.
- Results will appear in the search results list. Click on any item to view it in the result view.
- Double-click on an item in your search results to open it in your web browser.
The result view is a complete browser window, relying on the same engine used by Safari. Clicking on links will display new pages, and the forward and back buttons allow you to move among the pages you've visited recently. This is not a full-featured browser, however. To open the page you're viewing in your browser, click on the "view in browser" button. You can quickly hide the result view by double-clicking on the divider between it and the search results list.
The status information shows you how many pages are in HistoryHound's index, as well as the number of results currently displayed (if any) and what HistoryHound is doing.
Recent Searches
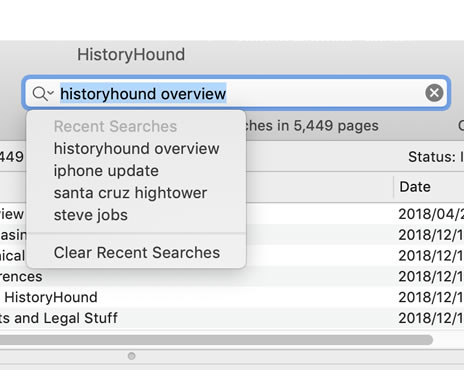
Once you've performed a few searches, you'll find your most recent queries in the Recent Searches menu. Just press the magnifying glass next to the search field to access the menu. Choosing a search query copies it into the search field and immediately starts a search.
Recent searches are also available in the Search menu in the menu bar.
Search Options
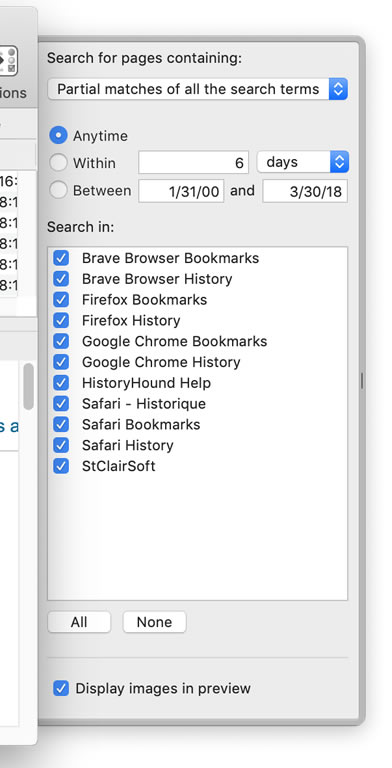
Pressing the Search Options button at the right-hand side of the search window slides out a drawer with additional options to control your queries. You can choose the type of search you want to perform by clicking the pop-up menu under Search for pages containing, and limit your search to specific portions of the index by selecting locations in the Search In list.
Search for pages containing:
This option allows you to tell HistoryHound how to interpret the search terms you give to it. The following options are available:
- Exact matches of all the search terms: HistoryHound will only return pages that contain all of your search terms as whole words.
- Partial matches of all the search terms: Your results will include pages that include all of your search terms, but the matches can be parts of words. For example, searching for "chas" would find pages containing "purchasing," "chase," and "chastise."
- Exact matches of any search term: Find pages that contain any of your terms. HistoryHound will rank the results, showing the ones with the most occurrences of your search words at the top.
- Partial matches of any search term: Perform a search for pages with words that contain any of your search terms. Searching for "hist" will match pages that contain "history", "histories", "historical", etc.
- Spotlight-style query:
If you have a more complex
search, a boolean query will allow you to specify it. This mode uses the
following boolean operators:
- & is used for AND
- | is used for OR
- ! is used for NOT
- parentheses can be used for grouping
As an example, searching for either "dog" OR "cat" AND "kennel" AND NOT "expensive" would be written:
(dog | cat) & kennel & !expensive
For complete documentation on the Spotlight query format, see https://developer.apple.com/documentation/coreservices/1443079-sksearchcreate
Search in:
The drawer contains a list of all of the locations that you have chosen to index in your HistoryHound preferences. You can limit your searches to particular areas, only searching in your Bookmarks, for example, when you know you're looking for something there. The All and None buttons below the list select and deselect all of the items in the list.
Display images in preview
This checkbox determines whether images are downloaded and displayed in the result view when you click on a search result. Turning images off will make pages load faster and will still allow you to see all of the text on the page.
Mini Search Palette
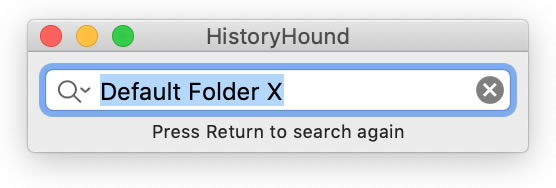 While HistoryHound's
main search window gives you a lot of information and control, sometimes
you just want to quickly do a search and get back to your browser. The
mini search palette, shown at left, is what you need. You can get to it
by choosing Search Palette from HistoryHound's Window menu.
While HistoryHound's
main search window gives you a lot of information and control, sometimes
you just want to quickly do a search and get back to your browser. The
mini search palette, shown at left, is what you need. You can get to it
by choosing Search Palette from HistoryHound's Window menu.
The mini search palette can be quickly brought to the front using HistoryHound's hot key (initially set to command-option-spacebar, but you can change that in the Preferences). You type in your search terms and HistoryHound sets off to search your history and bookmarks. When it finds results, it displays them in a popup list, as shown below. Using the arrow keys or the mouse, selecting one of the results in the list will open it in your web browser. HistoryHound does its job and then gets out of your way.
Index Status Window
So, HistoryHound has indexed all of the web pages in your History and Bookmarks. What's in there? Choose Index Status from the Window menu to find out.
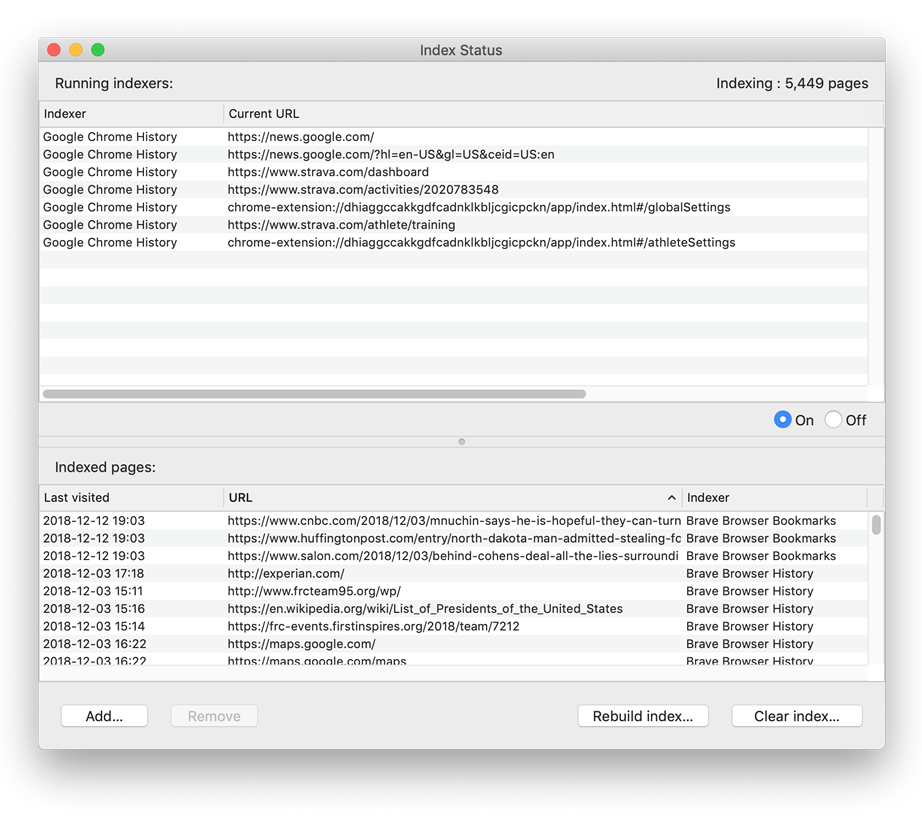
The index status window displays a list of the pages in your index and the currently active indexers (the behind-the-scenes components that read bookmarks, history files, cache files, etc). It also provides controls to let you add and remove pages and rebuild or clear the index entirely.
Indexers run periodically (see Preferences to change how often they run) and when building the entire index from scratch, can take quite a bit of time and CPU power. You can use the On / Off buttons to temporarily turn HistoryHound's indexing off. Indexing will be automatically turned back on if you quit HistoryHound and relaunch it.
The Add... button can be used to manually add URLs, files, and folders to the index. HistoryHound currently knows how to index URLs and many types of text files. It will index anything containing an <html> tag, and text files with the following extensions: html, htm, txt, text, h, m, mm, c, cc, c++, cpp, java, pl.
The Remove button removes any selected URLs from the index. You can select multiple URLs at once by holding down the Shift or Command key. Note that if you're looking for a particular URL in the index, you can use the Find command in the Edit menu to search through the list of indexed pages.
Rebuild Index… will re-download and re-index all of the pages currently in your index. After you click the button, HistoryHound will write out a file containing all of the URLs in your index, then clear your index and begin rebuilding it by downloading and indexing every URL in that file. This function is useful for recovering your index if it becomes corrupted, or if you want to "refresh" all of the pages in the index with whatever is currently on the web (rather than what was there when they were added to the index).
Clear Index… will clear the entire index. After you click the button, HistoryHound will remove all of the pages in your search index. Note: Be careful about using this because you may remove data that you cannot easily get back.
Error Window
Choose Errors from the Window menu to see HistoryHound's error window. This lists any errors that HistoryHound encountered while creating its index. Some web pages may not have been online at the time, while others may contain no text, only images. HistoryHound makes a note of each of these as it creates your index. Errors are forgotten when you quit HistoryHound.