Preferences
The Preferences Window
HistoryHound offers a number of customizable preferences so you can tailor the way it works to fit your style. To access the preferences dialog, choose Preferences… from the HistoryHound application menu.
Searching

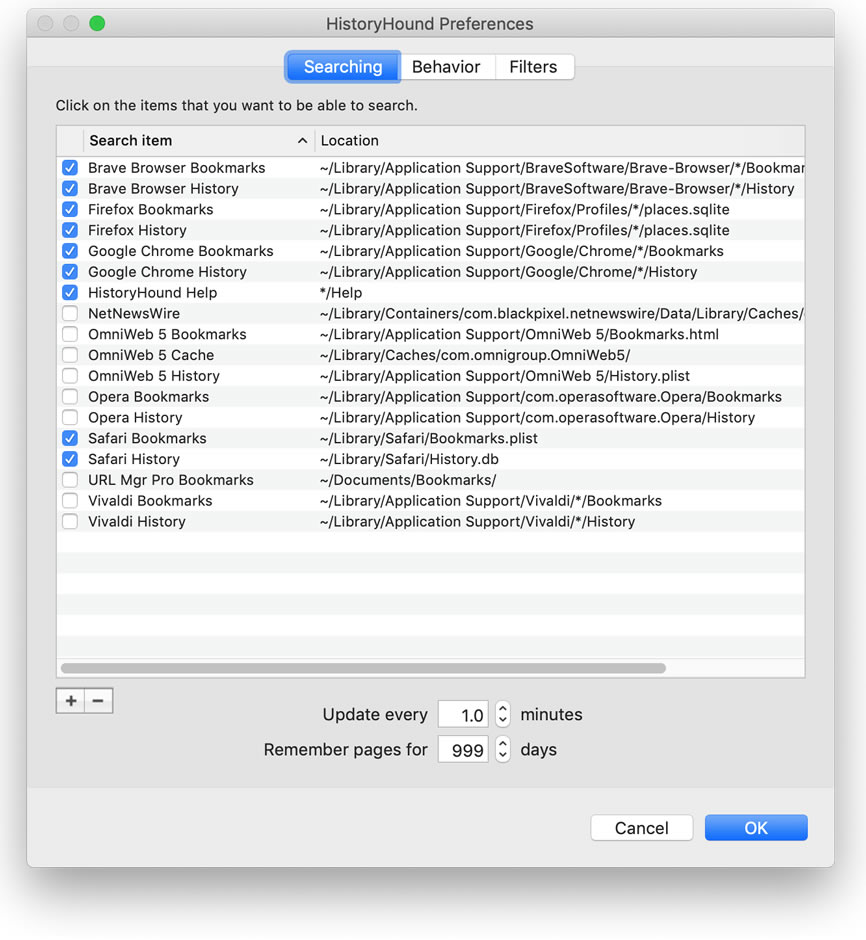
The Searching tab in the preferences dialog offers the options shown at right. Most important in this window is the search item list. Turning on the check mark next to an item tells HistoryHound to add those pages to its index so you can search them.
Note: Turning off a checkbox next to an item does not remove it from the index. It only stops HistoryHound from adding new pages to the index. To remove items from the index, please see the the section about the Index Window.
The + / - buttons below the search item list allow you to add and remove items to be searched. The + button can be used to add URLs, files, and folders to the list of items to be indexed. HistoryHound will index anything containing an <html> tag, and text files with the following extensions: html, htm, txt, text, h, m, mm, c, cc, c++, cpp, java, pl. For programmers or web developers, this can be a very convenient way to search through reference material on your hard disk. The - button removes the selected item from the list. Again, this does not remove pages in your index that were added by that item.
The scan for changes every XX minutes setting controls how often HistoryHound checks the search items to see if there are any new pages to index. Since scanning generally uses very little memory or processing time, you should set this time to be fairly low so that HistoryHound's index is never out of date.
Remember pages for XX days tells HistoryHound how long to keep pages from your history in its index. Once a page is older than the specified number of days, it will be removed from your index and can no longer be searched. Bookmarked pages are never removed from the index.
Expert's note: Double-clicking on the Location of any search item will allow you to edit the path of that item. If your history and bookmark files are not in the location where your browser stores them by default, you may have to modify this. Normally, HistoryHound's default settings will work correctly.
Behavior
 The behavior
tab contains a number of settings that change the way HistoryHound behaves
(surprise, surprise!).
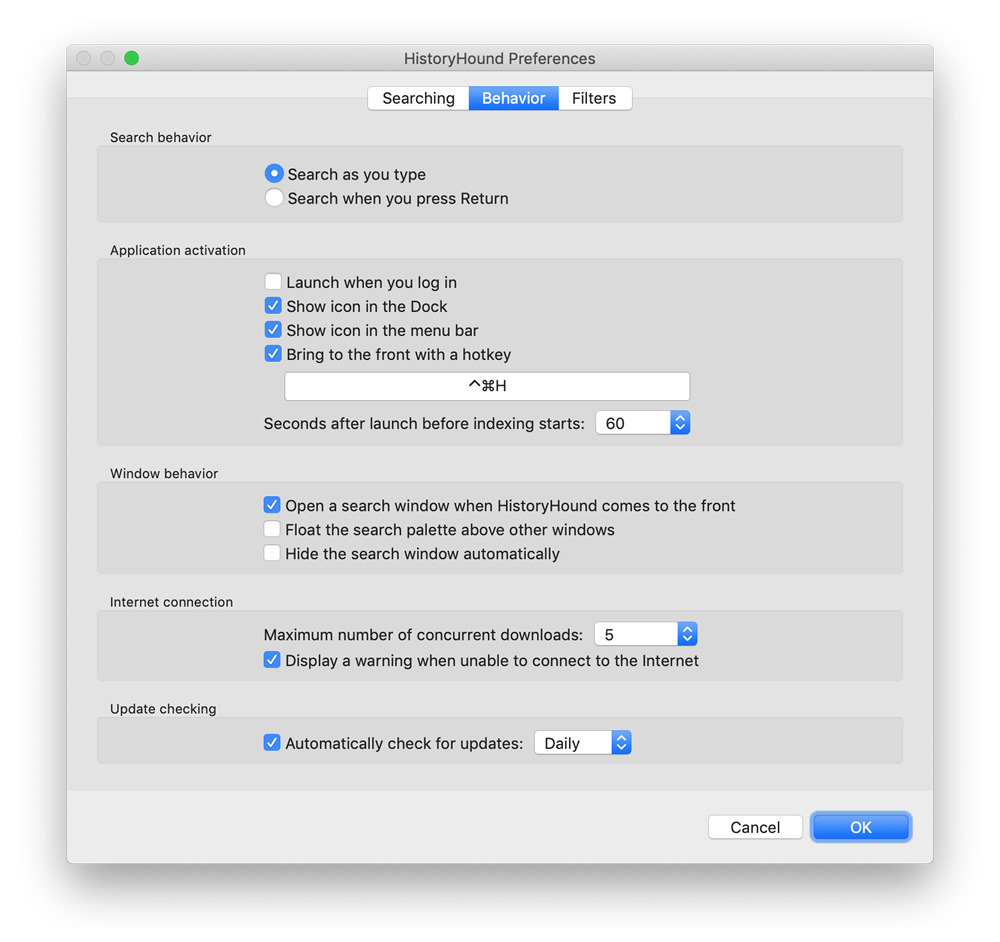
Search as you type / Search when you press return determines when HistoryHound begins a search. When as you type is selected, a search is started whenever you type a search term. If you continue typing, that search is canceled and a new one is started. If your index is particularly large or your have a slower computer, this behavior can become sluggish. If that happens to you, choose when you press return instead.
Launch when you log in is usually best to have turned on. This will add HistoryHound to the Startup Items list in your Account settings in System Preferences. If HistoryHound is running all the time, it can easily keep its index up to date with your browser history and bookmarks.
Show icon in the Dock determines whether HistoryHound's icon is shown in the Dock and in macOS's "application switcher" window when you press Command-Tab. If you leave HistoryHound running all the time in the background, you may want to turn this off.
Show icon in the menu bar puts a little paw-print icon in your menu bar, letting you quickly access HistoryHound from anywhere, even if you've turned its icon off in your Dock.
Bring to the front with a hotkey does just that. This is extremely convenient for quick searches using the search palette. Click on the hotkey field to change the key combination you want to use.
The seconds after launch before indexing starts menu allows you to make HistoryHound "sit quietly" after it starts up. This delays the start of HistoryHound's indexing and is helpful in reducing the demands on your Mac during the login process when you have HistoryHound set to launch automatically at login time.
Open a search window when HistoryHound comes to the front will make sure that whenever you switch to HistoryHound, there's a search window open and ready for you to use.
Float search palette above other windows keeps the search palette visible, regardless of whether HistoryHound is frontmost or not. Some users like to keep the HistoryHound palette floating in the corner of their screen for quick access.
Hide search window automatically controls the behavior of the active search window (either the full search window or the mini search palette). When HistoryHound is not the frontmost application, it will hide the search window. This is very convenient if you use HistoryHound frequently via the hot key or clicking on its icon in the Dock.
The maximum number of concurrent downloads setting lets you specify how many pages HistoryHound will try to download at once. HistoryHound will normally perform multiple downloads at once because much of the time is actually spent waiting for a web server to respond. Note that regardless of this setting, files on your hard disk are done one at a time because there is no bottleneck in getting data from the disk (indexing disk-based pages in multiple threads would actually be slower).
Display a warning when unable to connect to the Internet causes HistoryHound to put up an error message if it needs to download pages and your Mac has no connection to the Internet. If you turn this setting off, HistoryHound will just quietly wait until the next time your computer is connected to the Internet before downloading and indexing new pages.
Automatically check for updates will query St. Clair Software's server to determine if there is a new version of HistoryHound available. The popup menu next to this option allows you to choose whether the checks are made daily, weekly, or monthly. You can manually check for updates by choosing "Check for Update…" from HistoryHound's menu.
Advanced

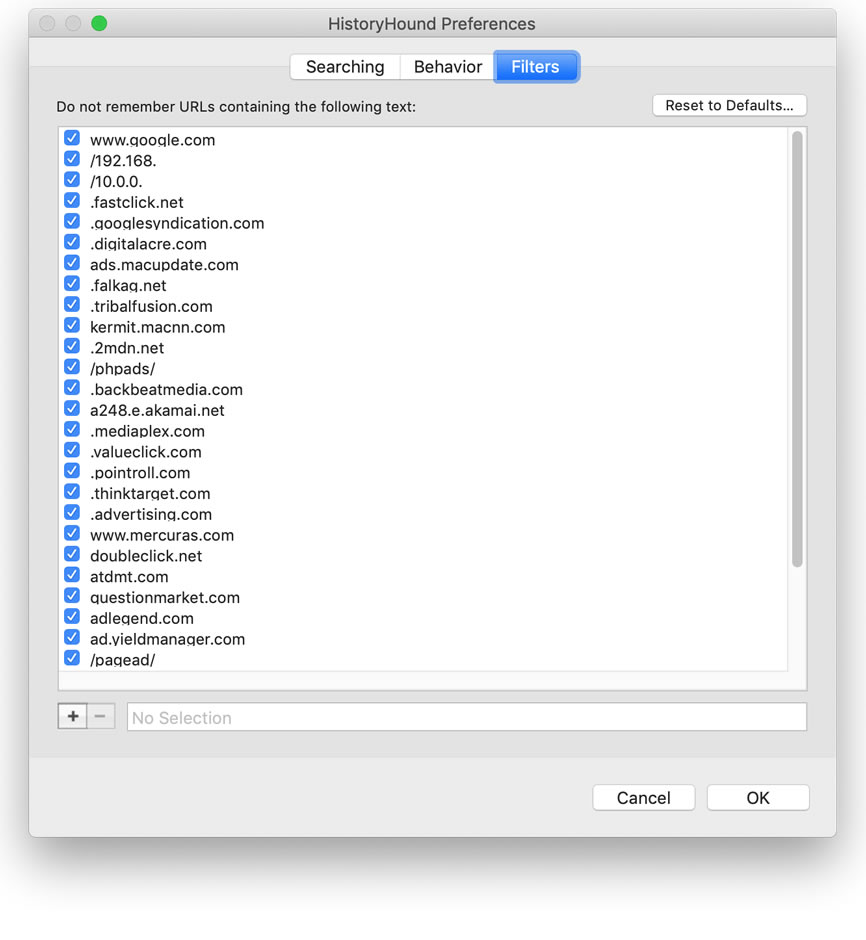
The advanced tab offers "URL filters" that you can use to help tailor HistoryHound's indexing to your needs. The strings in the list serve as "filters" to prevent HistoryHound from adding pages that you don't want in the index. This can be used for security purposes, or to keep from filling your search index with useless advertisements, data-driven web pages and the like. By default, strings are provided for eliminating advertising pages from some common sources. To add additional filters, simply press the '+' button and type in a new string. You should enter something that appears in the URL of the pages that you don't want added to the index.
Note that you can add filters "on the fly" by control-clicking on URLs in your search results or in the Index Status window.